So, um, hey guys. It's been awhile. What may have happened in the intervening year, you ask? Well, several things. I moved and had a baby, for starters. I also completely abandoned paleo for multiple reasons, including morning sickness, stress, and burnout on food in general. I really wasn't doing well on paleo near the end of it (around the time I wrote the shrimpy new year post back in Jan 2010) and the time off this past year has given me space to sit back and think about why it wasn't working for me and how I think I can improve it.
In short, I was "faileo" dieting. It had become about what I was excluding instead of what I was including and after 4 years of that my health was suffering. I've made myself a list of things that I think will vastly improve my version of the paleo diet, which I'll share with y'all partly in hopes it may help others and partly for my own reference. A lot of the old recipes on this site are probably more faileo than paleo, but I'm gonna leave them all up anyway in case someone finds them useful/tasty/whatever. So here are the guidelines for my new and improved ancient diet (har har):
1. Eat less meat. Shocking. My old recipes you'll see call for around 1/2 lb per person, and I've since found that this is WAY too much protein for me. I feel way better when I slash that in half.
2. Make the meat I eat fattier. Less chicken breast + olive oil, more fatty beef roasts.
3. Make a concerted effort to eat offal, including bones.
4. Make a concerted effort to eat seafood, including shellfish, roe, and seaweed.
5. Eat at least some meat/seafood raw.
6. Choose animal fats over plant fats whenever possible. I may keep butter around...even though it's dairy I think it's a better option than olive oil, which I previously used by the bucketful.
7. Eat more carbs, choosing tubers and squashes over fruit.
8. Severely limit nuts/seeds.
9. Add in herbal infusions like the nettle infusion that I posted about a million years ago and never kept up with. Tons of nutrients in that stuff.
10. Add in some fermented foods.
11. No "paleo" baked goods.
So I'll be back in January with recipes and pictures just like before. Anything in particular that people would like to see?
Showing posts with label paleodiet. Show all posts
Showing posts with label paleodiet. Show all posts
Friday, December 17, 2010
Sunday, January 3, 2010
A very shrimpy new year
Hello little blog, how have you been? I've been busy moving and visiting family over the holidays, but now I'm ready to get back to updating you. In fact, my only resolution this year is actually to blog more often! So let's get to it.
I found a nice looking bag of frozen, unpeeled shrimp at my new grocery store (since moving I've swapped a Whole Foods for a Wegman's) and decided what the heck - I don't do a lot of seafood, but I always feel like I should, and shrimp seem a rather unthreatening place to start. I know shrimp overcook pretty easily, so I wanted to make something where I could just drop them in in the last few minutes. My standby curry seemed a good place to start, both for the ease of cooking and for the fact that the strong curryness would hide the seafoody shrimpyness. Yes I'm a wimp.
Curry is one of my favorite go-to meals when I don't really feel like cooking. All it requires you to have on hand are a can of coconut milk, a jar of curry paste, whatever random assortment of veggies you have languishing about, and some kind of meat. The basic instruction is: brown onions in coconut oil, add in all the other ingredients, simmer 20 minutes.
GO-TO CURRY shrimpy style
serves 3 maybe
The culprits today:
copious amounts of coconut oil
half a large onion
2 tiny sweet potatoes
1 stalk of celery
a can of coconut milk
a small jar of green curry paste
1/2 cup frozen peas
huge handful of baby spinach
1 lb shrimp
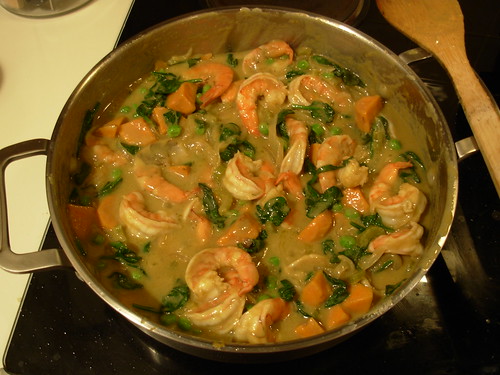
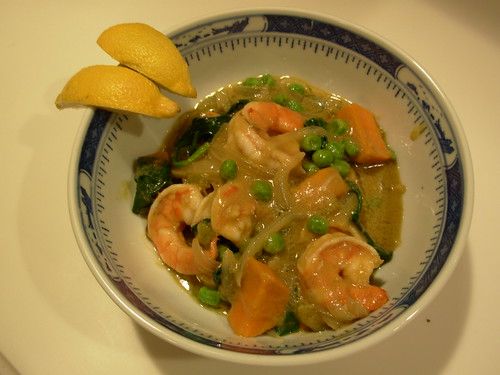
I heated the coconut oil in a big skillet and set the onions, sweet potatoes and celery to browning. Then I added the curry paste and let it fry for a minute until it got fragrant, followed by the can of coconut milk, and let it simmer for 15 minutes. Then I stirred in the peas and spinach until the spinach started to wilt, followed by the shrimp. Watched it like a hawk and removed it from the heat just when the shrimp turned pink. Done! Served it with lemon wedges to spruce it up a little bit.
To be very strictly paleo you wouldn't want to use the peas or possibly the sweet potatoes, but like I said - just add whatever veggies you have in the house and it'll be fine. My curry is different every single time I make it! If I'm using a different, longer-cooking meat such as chicken, I usually add in at the same time I add the coconut milk.
Since the shrimp I bought needed to be peeled, I was left with a big pile of shrimp shells. I decided to try making some shrimp stock. I have no idea how this tastes yet, and frankly I'm a little leery of it (eww seafood!), but I'm determined to find some way to eat it this week.
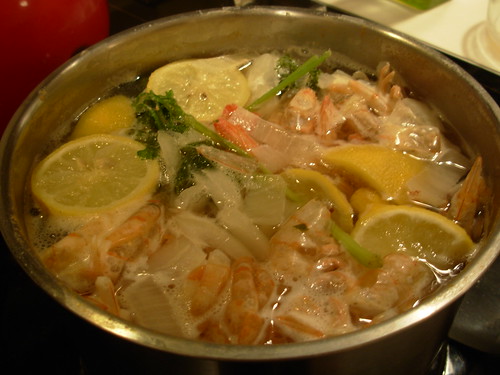
I read a few recipes online and amalgamated them to this:
SHRIMP STOCK
shells and tails from 1 lb of shrimp
1/4 of an onion, chopped
1 stalk of celery, chopped
1/2 a big carrot, chopped
a few sprigs of parsley
1 small lemon, sliced
1 bay leaf
5 whole peppercorns
1/2 tsp sea salt
water to cover
I combined everything in a smallish pot and brought it to a boil. Skimmed the foam, reduced the heat, and let it simmer for an hour.
Now I have this:
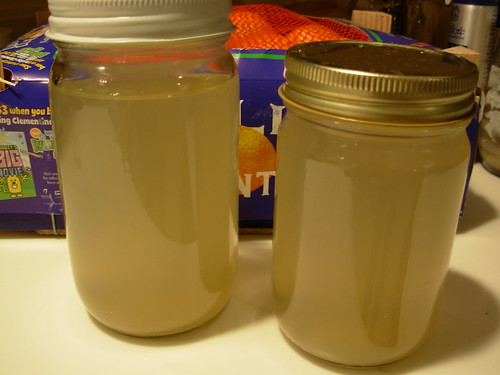
And no idea what to do with it! Please don't say seafood soup, I can't think of anything more horrifying.
In the meantime, maybe I'll start cooking some stuff out of my shiny new cookbooks.
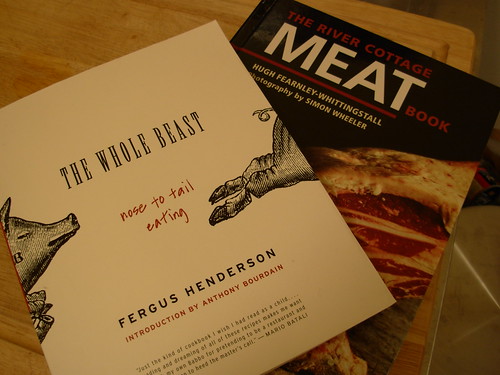
The Whole Beast - Nose to Tail Eating by Fergus Henderson and The River Cottage Meat Book by Hugh Fearlessly-Eatsitall. I can't wait! Happy New Year everyone!
I found a nice looking bag of frozen, unpeeled shrimp at my new grocery store (since moving I've swapped a Whole Foods for a Wegman's) and decided what the heck - I don't do a lot of seafood, but I always feel like I should, and shrimp seem a rather unthreatening place to start. I know shrimp overcook pretty easily, so I wanted to make something where I could just drop them in in the last few minutes. My standby curry seemed a good place to start, both for the ease of cooking and for the fact that the strong curryness would hide the seafoody shrimpyness. Yes I'm a wimp.
Curry is one of my favorite go-to meals when I don't really feel like cooking. All it requires you to have on hand are a can of coconut milk, a jar of curry paste, whatever random assortment of veggies you have languishing about, and some kind of meat. The basic instruction is: brown onions in coconut oil, add in all the other ingredients, simmer 20 minutes.
GO-TO CURRY shrimpy style
serves 3 maybe
The culprits today:
copious amounts of coconut oil
half a large onion
2 tiny sweet potatoes
1 stalk of celery
a can of coconut milk
a small jar of green curry paste
1/2 cup frozen peas
huge handful of baby spinach
1 lb shrimp
I heated the coconut oil in a big skillet and set the onions, sweet potatoes and celery to browning. Then I added the curry paste and let it fry for a minute until it got fragrant, followed by the can of coconut milk, and let it simmer for 15 minutes. Then I stirred in the peas and spinach until the spinach started to wilt, followed by the shrimp. Watched it like a hawk and removed it from the heat just when the shrimp turned pink. Done! Served it with lemon wedges to spruce it up a little bit.
To be very strictly paleo you wouldn't want to use the peas or possibly the sweet potatoes, but like I said - just add whatever veggies you have in the house and it'll be fine. My curry is different every single time I make it! If I'm using a different, longer-cooking meat such as chicken, I usually add in at the same time I add the coconut milk.
Since the shrimp I bought needed to be peeled, I was left with a big pile of shrimp shells. I decided to try making some shrimp stock. I have no idea how this tastes yet, and frankly I'm a little leery of it (eww seafood!), but I'm determined to find some way to eat it this week.
I read a few recipes online and amalgamated them to this:
SHRIMP STOCK
shells and tails from 1 lb of shrimp
1/4 of an onion, chopped
1 stalk of celery, chopped
1/2 a big carrot, chopped
a few sprigs of parsley
1 small lemon, sliced
1 bay leaf
5 whole peppercorns
1/2 tsp sea salt
water to cover
I combined everything in a smallish pot and brought it to a boil. Skimmed the foam, reduced the heat, and let it simmer for an hour.
Now I have this:
And no idea what to do with it! Please don't say seafood soup, I can't think of anything more horrifying.
In the meantime, maybe I'll start cooking some stuff out of my shiny new cookbooks.
The Whole Beast - Nose to Tail Eating by Fergus Henderson and The River Cottage Meat Book by Hugh Fearlessly-Eatsitall. I can't wait! Happy New Year everyone!
Wednesday, October 7, 2009
Pumpkin Sausage Soup

PUMPKIN SAUSAGE SOUP
serves 6
ingredients:
1-1.25 lbs bulk breakfast sausage (if you want to make some yourself, I have a recipe here: http://cavemanfood.blogspot.com/2009/03/turkey-or-pork-breakfast-sausage.html)
1/2 a large onion, minced
1/2 cup mushrooms, sliced
1 small cooking pumpkin, peeled and cut into 1-inch chunks (or one 15-oz can of pumpkin)
4 cups chicken stock
1 tsp dried oregano
1 tsp dried thyme
pinch of dried rosemary
1 tsp paprika
pinch of red pepper flakes
1 tsp sea salt or to taste
2 T butter or some other more paleo cooking fat
1/2 cup coconut milk
Heat the butter in a heavy deep pot and saute the mushrooms over medium-high heat until golden. Remove from the pot to a small bowl, leaving the butter. Add the onions to the pot and saute them until golden, then remove them to a separate bowl. Add the sausage to the pot and brown it until it is cooked through and looks tasty. Remove the sausage from the pot and set aside.
Add the pumpkin to the pot and deglaze with the chicken stock. Add the onions back in and simmer until the pumpkin is soft, about 10 minutes. Puree the soup (a hand blender is easiest, but a regular blender will do). Add in all the remaining ingredients except the coconut milk (don't forget to add in the cooked mushrooms and sausage!), and simmer for 20 minutes. Remove from the heat and stir in the coconut milk.
---------
That's the hard way to make the soup. :) The easy way is to cook the onions, mushrooms and sausage all together at once and use canned pumpkin, saving some steps and a dirty blender. The easy way makes perfectly fine soup, but it won't have the same layers of texture and flavor that the harder version does.
---------
recipe adapted from: http://www.recipezaar.com/Low-Carb-Pumpkin-Sausage-Soup-106467
Wednesday, August 5, 2009
Primal Challenge Day 3 plus steak fajita and tomatillo salsa recipes
weight: 135 lbs (no change)
breakfast: none
lunch:
*leftover beer-marinated steak
*salad - escarole, radicchio, endive, carrot, celery, cucumber, balsamic vinegar, extra virgin olive oil and ground cherries - I've never had ground cherries before but I got them in my CSA and had no idea what to do with them so I threw them in the salad. They were good! Kinda tomatillo-y.
*roasted unsalted almonds
*mug of black tea
snack: none
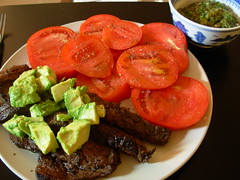
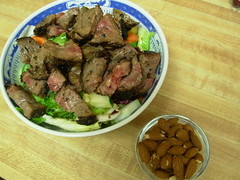
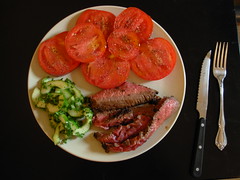
dinner:
*beef fajita strips
*avocado tossed with sea salt and lime juice
*spicy tomatillo salsa
*sliced tomato with sea salt, black pepper, and exra virgin olive oil
dessert: none
For the fajitas I mostly used this recipe for the marinade: http://www.texascooking.com/recipes/fajitamar1.htm, but I added a jalapeno and a handful of cilantro and a splash of triple sec. I marinated 1.5 lbs skirt steak in it all afternoon, then patted it dry and seared it in a cast iron skillet for 5 minutes on each side. While the meat rested, I poured the leftover marinade back into the pan and let it bubble down a little as I scraped the bottom. Then I sliced the steak and tossed it back in the pan and heated it in the reduced marinade for about 2 minutes. It was great!
I also made some spicy tomatillo salsa because I needed to use up some tomatillos that we got in our CSA. I used this recipe from Rick Bayless: http://topchefs.chef2chef.net/recipes/rbayless/roasted-tomatillo-salsa.htm It is really killer! Super spicy and a great flavor. I think I followed it exactly, for once.
I've been having tomatoes as side dishes a lot because we get them in our CSA and cooked tomatoes give me heartburn.
exercise:
Went to the county parks and recreation website and found a public pool. Paid $8 and swam a few laps then soaked up some sun. Yay vitamin D! Also, I suck at swimming and found it unreasonably exhausting. I could only do 1 full lap without stopping. After that I had to stop halfway across the pool each time. Even so I only managed 4.5 laps. Well you gotta start somewhere, right?
Also I walked 1.5 miles. My butt is sore today from all the walking I did yesterday. Shrink butt, shrink!
breakfast: none
lunch:
*leftover beer-marinated steak
*salad - escarole, radicchio, endive, carrot, celery, cucumber, balsamic vinegar, extra virgin olive oil and ground cherries - I've never had ground cherries before but I got them in my CSA and had no idea what to do with them so I threw them in the salad. They were good! Kinda tomatillo-y.
*roasted unsalted almonds
*mug of black tea
snack: none
dinner:
*beef fajita strips
*avocado tossed with sea salt and lime juice
*spicy tomatillo salsa
*sliced tomato with sea salt, black pepper, and exra virgin olive oil
dessert: none
For the fajitas I mostly used this recipe for the marinade: http://www.texascooking.com/recipes/fajitamar1.htm, but I added a jalapeno and a handful of cilantro and a splash of triple sec. I marinated 1.5 lbs skirt steak in it all afternoon, then patted it dry and seared it in a cast iron skillet for 5 minutes on each side. While the meat rested, I poured the leftover marinade back into the pan and let it bubble down a little as I scraped the bottom. Then I sliced the steak and tossed it back in the pan and heated it in the reduced marinade for about 2 minutes. It was great!
I also made some spicy tomatillo salsa because I needed to use up some tomatillos that we got in our CSA. I used this recipe from Rick Bayless: http://topchefs.chef2chef.net/recipes/rbayless/roasted-tomatillo-salsa.htm It is really killer! Super spicy and a great flavor. I think I followed it exactly, for once.
I've been having tomatoes as side dishes a lot because we get them in our CSA and cooked tomatoes give me heartburn.
exercise:
Went to the county parks and recreation website and found a public pool. Paid $8 and swam a few laps then soaked up some sun. Yay vitamin D! Also, I suck at swimming and found it unreasonably exhausting. I could only do 1 full lap without stopping. After that I had to stop halfway across the pool each time. Even so I only managed 4.5 laps. Well you gotta start somewhere, right?
Also I walked 1.5 miles. My butt is sore today from all the walking I did yesterday. Shrink butt, shrink!
Monday, August 3, 2009
Primal Challenge Day 1
Age: 26
Height: 5 feet 7 inches
Weight: 136.4 lbs
Waist at narrowest point: 27 in
Waist at navel: 30.5 in
Hips: 36 in
Breakfast:
none
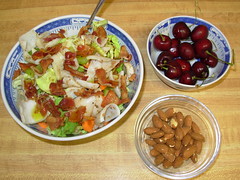
Lunch:
Large salad - butter lettuce, radicchio, carrot, celery, squid, bacon, balsamic vinegar, extra virgin olive oil
cherries
roasted unsalted almonds
primal lemonade - water, lemon juice, stevia
Snack:
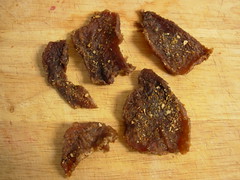
Homemade beef jerky (this batch didn't turn out very well or I'd give you the recipe)
Dinner:
Beer marinated flap steak
Cucumber salad with parsley, mint, extra virgin olive oil and rice vinegar
Sliced tomato with salt, pepper and extra virgin olive oil

Dessert:
87% dark chocolate
peppermint/lemongrass/ginger tea
Exercise:
bodyweight workout that I modified from Son of Grok that I did for 7 minutes - 5 pushups, wall sit for 10 seconds, 20 jumping jacks, 5 stand ups, rest 30 seconds
walked about 1.5 miles
So, you may have noticed that sneaky little word in my big lunch salad...squid?! Well I was at Whole Foods yesterday and as usual I walked by the seafood counter on my way to the butcher case. I usually give it a desultory glance and move on. Yesterday, I noticed a pretty little pile of meat and tentacles at a shockingly low price and I felt a kind of madness steal over me. Before I knew what was happening I found myself telling the fish guy to give me half a pound of squid. I've never bought or cooked squid before in my life. I ended up broiling it, but I think I must have cooked it too long because it got a little rubbery. It was fine tossed in my salad though since I drowned it out with bacon and balsamic vinegar. :)
The steak recipe I used for dinner is reallllllly good. The marinade does include beer though, so if wheat=death for you it might not be your cup of tea.
Overall, I think day 1 has been a success. :)
Height: 5 feet 7 inches
Weight: 136.4 lbs
Waist at narrowest point: 27 in
Waist at navel: 30.5 in
Hips: 36 in
Breakfast:
none
Lunch:
Large salad - butter lettuce, radicchio, carrot, celery, squid, bacon, balsamic vinegar, extra virgin olive oil
cherries
roasted unsalted almonds
primal lemonade - water, lemon juice, stevia
Snack:
Homemade beef jerky (this batch didn't turn out very well or I'd give you the recipe)
Dinner:
Beer marinated flap steak
Cucumber salad with parsley, mint, extra virgin olive oil and rice vinegar
Sliced tomato with salt, pepper and extra virgin olive oil
Dessert:
87% dark chocolate
peppermint/lemongrass/ginger tea
Exercise:
bodyweight workout that I modified from Son of Grok that I did for 7 minutes - 5 pushups, wall sit for 10 seconds, 20 jumping jacks, 5 stand ups, rest 30 seconds
walked about 1.5 miles
So, you may have noticed that sneaky little word in my big lunch salad...squid?! Well I was at Whole Foods yesterday and as usual I walked by the seafood counter on my way to the butcher case. I usually give it a desultory glance and move on. Yesterday, I noticed a pretty little pile of meat and tentacles at a shockingly low price and I felt a kind of madness steal over me. Before I knew what was happening I found myself telling the fish guy to give me half a pound of squid. I've never bought or cooked squid before in my life. I ended up broiling it, but I think I must have cooked it too long because it got a little rubbery. It was fine tossed in my salad though since I drowned it out with bacon and balsamic vinegar. :)
The steak recipe I used for dinner is reallllllly good. The marinade does include beer though, so if wheat=death for you it might not be your cup of tea.
Overall, I think day 1 has been a success. :)
Wednesday, July 15, 2009
Spicy burgers with basil mayonnaise
Made these spicy pork and beef burgers today from N1Kitchen.
They were yum! For the mayonnaise I took the idea and used my own mayo recipe (the one from The Garden of Eating), using half extra virgin olive oil and half cold pressed macadamia oil. I find 100% EVOO mayos much too strong and the macadamia cuts down on that nicely while still remaining a mostly monounsaturated oil. Too bad macadamia oil is so $$$ or I'd use it more often.
We had the burgers with shredded cabbage that I parboiled and then tossed with some of the basil mayo and some steamed broccoli.
We devoured it before I remembered to take a picture, but I thought the recipe was so good I wanted to share it anyway! We were licking the plates clean.
Sunday, July 12, 2009
One Local Summer Week 6 - Pork Chili Verde
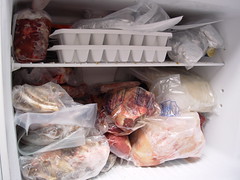
I got busy with holiday stuff last weekend and missed out on making a One Local Summer meal, so I'm getting back into the swing of it this week. We have lots of good local food in the house right now - picked up a freezer full of meat from my Polyface Farm dropoff this weekend, bought some nice fruit at the Columbia Pike Farmer's Market today, and I still have a few things leftover from my CSA dropoff last Monday.
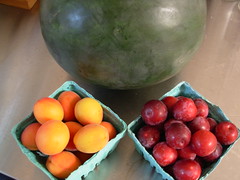
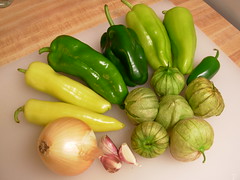
This week it seemed like the farmer's market was full of peppers, squash and tomatoes. I already had squash and garlic at home from my CSA, so I went with the peppers today and decided to make some chili verde. I got peppers and onions from Westmoreland Vegetables (couldn't find a website for them) and tomatillos from another farmer's market stand that didn't have a sign and I don't know what the name of the farm was. The lard, pork and chicken stock are all Polyface.

(the squash isn't in the picture, I forgot it in the fridge! it was green and just about the size of my forearm)
PORK CHILI VERDE
ingredients:
2 T lard
1 onion, chopped
2 poblano peppers, chopped
2 cubanelle peppers, chopped
2 Anaheim peppers, chopped
1 jalapeno pepper, minced
6 tomatillos, chopped finely
1 green summer squash, chopped
3 cloves of garlic, minced
1 lb ground pork
2-4 cups chicken stock (depending on how thick you like it)
1 tsp cumin
2 tsp dried oregano or 2 T fresh oregano
1 tsp sea salt
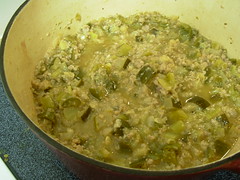
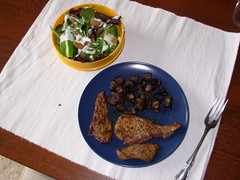
Heat the lard in a Dutch oven and brown all the vegetables except the squash and garlic until they start to get soft. Add the garlic and cook for a minute until fragrant. Add the pork and cook until no longer pink. Add the chicken stock and seasonings, bring to a boil, lower heat, and simmer for 1 hour.
Some good non local toppings: fresh cilantro, diced avocado, lime juice
--------------------------------
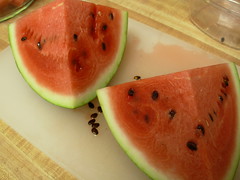
For dessert I cracked open that big ole watermelon you see up top and cubed it up and we went to town. Seeds everywhere. Ugly, but good. :)
This week it seemed like the farmer's market was full of peppers, squash and tomatoes. I already had squash and garlic at home from my CSA, so I went with the peppers today and decided to make some chili verde. I got peppers and onions from Westmoreland Vegetables (couldn't find a website for them) and tomatillos from another farmer's market stand that didn't have a sign and I don't know what the name of the farm was. The lard, pork and chicken stock are all Polyface.
(the squash isn't in the picture, I forgot it in the fridge! it was green and just about the size of my forearm)
PORK CHILI VERDE
ingredients:
2 T lard
1 onion, chopped
2 poblano peppers, chopped
2 cubanelle peppers, chopped
2 Anaheim peppers, chopped
1 jalapeno pepper, minced
6 tomatillos, chopped finely
1 green summer squash, chopped
3 cloves of garlic, minced
1 lb ground pork
2-4 cups chicken stock (depending on how thick you like it)
1 tsp cumin
2 tsp dried oregano or 2 T fresh oregano
1 tsp sea salt
Heat the lard in a Dutch oven and brown all the vegetables except the squash and garlic until they start to get soft. Add the garlic and cook for a minute until fragrant. Add the pork and cook until no longer pink. Add the chicken stock and seasonings, bring to a boil, lower heat, and simmer for 1 hour.
Some good non local toppings: fresh cilantro, diced avocado, lime juice
--------------------------------
For dessert I cracked open that big ole watermelon you see up top and cubed it up and we went to town. Seeds everywhere. Ugly, but good. :)
Friday, July 10, 2009
a bunch of old meal pics
I was going through some of my old pictures today and I found some that I took before I started my blog. I don't intend to really write any of them up as individual posts, but I thought people might be interested in seeing them to get ideas. If you want to see them in a bigger size just click on the picture.
Steak, mustardy mushrooms, salad with almonds and I think tahini dressing.
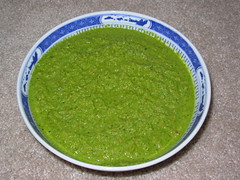
Blended salad soup. It was, um, an experiment. An experiment gone horribly awry.
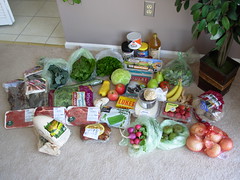
Shopping haul.
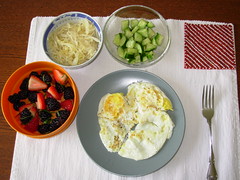
Fried eggs, blackberries and strawberries with mint, sauerkraut, cucumbers with a drizzle of olive oil.
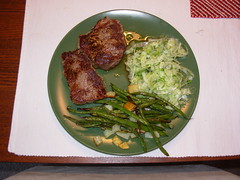
Ribeye steak, raw fennel salad, roasted green beans and potatoes.
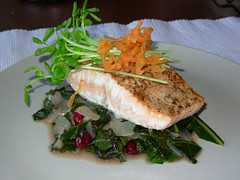
Salmon on a bed of collards cooked with onions and cranberries, garnished with grated carrots and pea shoots. I remember trying to make this picture look fancy but I don't remember why!
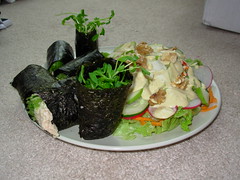
Tuna salad and pea shoots wrapped in nori seaweed and a salad with walnuts and tahini dressing.
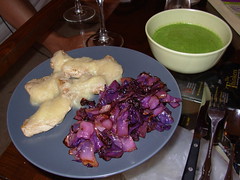
Pork tenderloin with cinnamon applesauce, sauteed red cabbage, parsley soup. I remember my applesauce recipe for this was awesome (maybe I'll dig it out and post it), but the parsley soup was kind of gross.
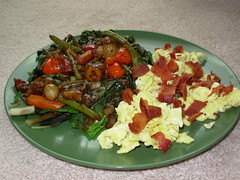
Scrambled eggs topped with bacon and a side salad topped with Trader Joe's balsamic frozen veggie mix.

Fried egg with parsley on top of braised swiss chard.
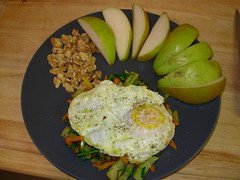
Fried egg on top of sauteed mixed veggies, walnuts and a pear.
Steak, mustardy mushrooms, salad with almonds and I think tahini dressing.
Blended salad soup. It was, um, an experiment. An experiment gone horribly awry.
Shopping haul.
Fried eggs, blackberries and strawberries with mint, sauerkraut, cucumbers with a drizzle of olive oil.
Ribeye steak, raw fennel salad, roasted green beans and potatoes.
Salmon on a bed of collards cooked with onions and cranberries, garnished with grated carrots and pea shoots. I remember trying to make this picture look fancy but I don't remember why!
Tuna salad and pea shoots wrapped in nori seaweed and a salad with walnuts and tahini dressing.
Pork tenderloin with cinnamon applesauce, sauteed red cabbage, parsley soup. I remember my applesauce recipe for this was awesome (maybe I'll dig it out and post it), but the parsley soup was kind of gross.
Scrambled eggs topped with bacon and a side salad topped with Trader Joe's balsamic frozen veggie mix.
Fried egg with parsley on top of braised swiss chard.
Fried egg on top of sauteed mixed veggies, walnuts and a pear.
Wednesday, July 8, 2009
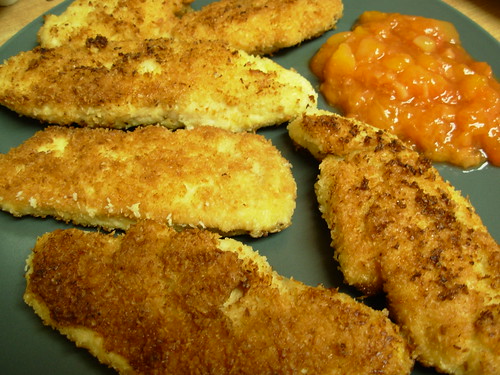
Coconut chicken fingers with spicy fruit chutney
One of the foods my husband and I really miss on the paleo or primal diet is breaded chicken. It's just soul satisfying comfort food for both of us. I do make a gluten free, grain free version of chicken fingers with almond flour sometimes, but tonight I thought I'd try something different. Keeping with the coconut theme I've had lately, I decided to dredge the chicken in unsweetened dried shredded coconut. I didn't want them to be naked, so I wanted to make a sauce, but pan sauce or gravy didn't seem right - so I decided to make a spicy fruit chutney. The result is a tropical dish that's just right for these hot summer evenings!
COCONUT CHICKEN FINGERS
serves 2
ingredients:
1-1.5 lbs boneless skinless chicken breast cut into large strips (4-5 per breast depending on if they have the tenders attached or not)
2-3 T coconut flour
1-2 eggs, beaten (start with 1 and use the second if you start to run out)
1 cup unsweetened dried shredded coconut
1 tsp sea salt
coconut oil for cooking
Set up a dredging station with 3 bowls, one for coconut flour, one for egg, one for shredded coconut. Season the coconut flour with the salt.
Dredge each chicken finger first in coconut flour, then egg, then shredded coconut.
Heat a bunch of coconut oil in a large heavy bottomed skillet over medium/medium-high heat. Cook the chicken fingers until golden brown on each side. Do it in more than one batch if necessary and keep cooked chicken fingers warm on a foil lined baking sheet in an oven set to the lowest setting.
------------------
SPICY FRUIT CHUTNEY
serves 4
2 cups of diced and peeled plums or nectarines or a mixture of the two
1/4 cup lemon juice
juice of 1/2 a lime
1/4 cup chopped dried apricots
2 inches of ginger root, peeled and minced
2 small dried red chili peppers (or 1/2 tsp cayenne pepper)
1 cinnamon stick
1/4 cup sweet white wine
pinch of sea salt
pinch of stevia, optional depending on if your fruit is really sour (taste before you add!)
Mix everything together in a small saucepan. Bring to a boil, lower heat, and simmer uncovered for 30 minutes until thick. Discard dried chilis and cinnamon stick. Can be eaten warm or cold.
Recipe adapted from The Garden of Eating.
Sunday, June 28, 2009
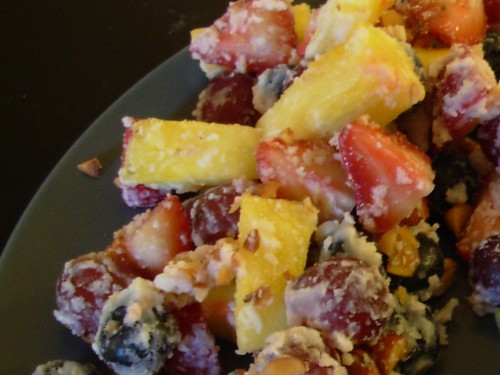
Coconutty Fruit Salad
I've been enjoying coconut lately (as you can see from my coconut milk ice cream!), and I came up with this yummy application the other day. I hardly eat fruit at all in the winter since everything is out of season but apples and pears, so when summer comes around I like to have a little fun. I've used a specialty ingredient in this fruit salad, which is coconut butter. It's just like any other nut butter in that it's the whole nut ground up into a paste. The kind I get is Artisana raw coconut butter, which is ground at low temperatures and supposedly retains all the coconutness of the coconut (you know, enzymes, vitamins, fiber, etc). I don't even know if any other companies make coconut butter. Anyway, if you can't find this stuff, I would substitute some unsweetened shredded coconut and maybe a few tablespoons of coconut milk (or even better, if you get the kind of coconut milk that separates in the can into a thick cream and a runny liquid, use only the thick cream).
COCONUTTY FRUIT SALAD
ingredients:
2 heaping cups mixed fruit (pictured is a heaping 1/2 cup each of blueberries, strawberries, red grapes and pineapple)
2 T raw coconut butter
1/4 cup toasted almonds
Cut your fruit any way you want it. Roughly chop the almonds. Gently warm the coconut butter until it becomes runny, then immediately toss with the fruit and nuts. The coldness of the fruit will make the coconut butter harden back up and stick to it like a shell. Dig in and enjoy! I've had this as breakfast, snack, and dinner side dish in the past few weeks. :)
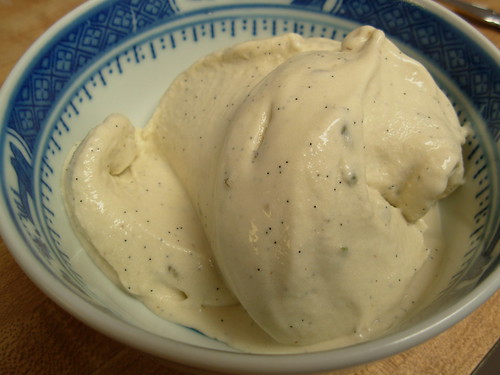
Coconut Milk Ice Cream
I don't really find most sweet dessert type things appealing anymore (especially pastry - blech), but I still have a soft spot for ice cream. I just love the stuff. There is a brand of ice cream I can find at Whole Foods that's made with coconut milk instead of dairy or soy, but the sweetener is agave syrup, which I won't eat due to the extremely high fructose content and heavy processing it undergoes. So now that the weather has been hot I have been making little ice cream treats at home. Last week I made some strawberry ice cream using this recipe from Elana's Pantry but subbing raw honey for agave. It was very nice. This week though, I got some lavender from my CSA and I decided to make a honey lavender ice cream. Forget "very nice," this stuff is AWESOME. And it's completely dairy and agave free! I've used a custard base for it, so it's a little more complicated to make than Elana's recipe, but the result is decadent. The base of this paleo ice cream would be very nice even without the lavender and could serve as a jumping off point for other mix-ins/flavorings.
COCONUT MILK ICE CREAM
honey/lavender/vanilla version :)
1 14-oz can full fat coconut milk
2 eggs
1 vanilla bean, cut in half lengthwise
1 T chopped fresh lavender flowers, optional (1 tsp dried)
3 T raw honey (adjust up or down to taste, but less honey will make it freeze much harder in the freezer)
ice cream maker
Set up a double boiler by placing a heat proof bowl over a pot of simmering water (be sure it's simmering and not a full rolling boil, as this will give you better control later). Add the coconut milk and lavender to the bowl. Scrape the insides of the vanilla bean into the coconut milk, then throw in the whole bean pod as well. Stirring fairly frequently, heat until the coconut milk is hot but not boiling.
Meanwhile, whisk the eggs well in a separate bowl. Once the coconut milk is hot, add a ladleful to the eggs while you're whisking - you want to bring the eggs up to the temperature of the coconut milk without scrambling them. Add in another ladleful of hot coconut milk to the egg mixture while whisking. Take the now hot egg mixture and whisk it into the bowl of coconut milk on the double boiler.
Now, whisk constantly until the mixture thickens to a custard. This may take several minutes. If it's getting too hot and starting to scramble, remove from the heat immediately but keep whisking, then return it to the double boiler. Once it has thickened to a custard, remove the bowl from the heat and let it cool.
Remove the vanilla bean pods. Once the custard is cool enough for you to stick your finger in it and hold it there without burning, whisk in the raw honey. Put the custard base in the refrigerator or freezer until it gets cold. Freeze in your ice cream machine per the manufacturer's instructions.
Straight out of the machine this ice cream has a creamy soft serve texture. If you store it in the freezer for later, just let it sit at room temperature for about 10 minutes before eating to let it soften up a little bit.
One Local Summer - Week Four
One of the nice things about blogging on my own schedule is that I can wait until I have something good to show you before posting about it. Since I'm not posting on my on schedule with this One Local Summer thing, this week you get to see some of my blah food.

I guess it doesn't look too bad, but it was just meh. We had green onion burgers made with ground beef from Smith Meadows Farms, lots of green onions from our CSA and held together with an egg from our CSA. On the side was a little slaw made with kohlrabi and basil from our CSA and a touch of extra virgin olive oil and vinegar. We also had some lovely golden zucchini from Red Rake Farm with some more CSA basil, sauteed up with a little lard that I rendered from Polyface pork fat. Nothing was bad exactly, but there is nothing here I would make again.
The golden zucchini I got from Red Rake Farm were so pretty. The guy told me that the day before they had been about an inch or two long and they literally quadrupled in size overnight!

I hope he has some more next week so that I can find something yummier to do with them. :) In the mean time, check out what other Southern folks are getting up to this summer at last week's roundup.
I guess it doesn't look too bad, but it was just meh. We had green onion burgers made with ground beef from Smith Meadows Farms, lots of green onions from our CSA and held together with an egg from our CSA. On the side was a little slaw made with kohlrabi and basil from our CSA and a touch of extra virgin olive oil and vinegar. We also had some lovely golden zucchini from Red Rake Farm with some more CSA basil, sauteed up with a little lard that I rendered from Polyface pork fat. Nothing was bad exactly, but there is nothing here I would make again.
The golden zucchini I got from Red Rake Farm were so pretty. The guy told me that the day before they had been about an inch or two long and they literally quadrupled in size overnight!
I hope he has some more next week so that I can find something yummier to do with them. :) In the mean time, check out what other Southern folks are getting up to this summer at last week's roundup.
Sunday, June 21, 2009
One Local Summer - Week Three
This week for One Local Summer I had a near miss that turned into a delicious hit! I love making great tasting food that's from local producers and also healthy and paleo - gluten and dairy free.

The star of dinner tonight was a roasted chicken from Polyface Farms. I rinsed and dried the chicken and then generously salted and peppered it inside and out. The outside I wrapped in bacon from EcoFriendly Foods and the inside I stuffed with two of the season's first peaches from Westmoreland Berry Farm. Into the oven at 425 for 30 minutes, then I reduced the heat to 350 and roasted it for an additional hour.
The plan was to end up with delicious bacon-wrapped chicken and some roasty peach chunks. My oven had other plans!
Now, I've made bacon wrapped chicken before and it's always turned out, but this time for some reason the bacon shriveled to itty bitty bacon cinders and became inedible. So not only did I have burned bacon, but I had flabby chicken skin. Erg. I removed the peaches from the chicken and noticed they were not roasty at all either. My plans had been foiled, but I thought there had to be some way to salvage this food. After a moment's pondering I set the bacon cinders aside and carved the chicken into two leg quarters, two breasts, and two wings. I put the chicken pieces on a foil lined baking sheet and put them back in the oven to turn the flabby skin crispy. What to do with the peaches...aha! Gravy!
To make the gravy, I took the peaches from the chicken cavity and heated them in a small saucepan with a good spoonful of drippings from the roasting pan and 1/4 cup sweet white wine from Rose Bank Winery along with a pinch of salt and about 1 inch of cinnamon stick. I put the heat to low, covered it, and let it simmer while I went to work on the veggie sides. I don't know if Rose Bank Winery can be considered local to northern Virginia, but we used to live about 3 minutes away from this winery and we bought a whole case of the wine that we're still working on! So it was local to us at one point. :)
To get our leafy greens in for the day I made some braised kale from Pleasant Fields Farm. First I sauteed some baby onions from our CSA in the chicken/bacon drippings, then added the kale and a little water, covered, and let it braise for about 15 minutes.
To add some freshness to the meal, I made a quick cucumber salad using crispy little Persian cucumbers from Toigo Orchards. They are so snappy and delicious! I tossed them with some chopped orange mint from Red Rake Farm, a drizzle of extra virgin olive oil, and a splash of rice vinegar. Red Rake Farm is one of my favorite stands at the Arlington Farmer's Market. It's all organic and their produce looks more "real" to me than some of the other places for some reason. And the owner, Peter, is always ready with a smile and story. Much nicer than shopping at a grocery store!

Once the veggies were ready, the chicken skin was crispy and the peaches were nice and broken down for the gravy, and dinner was served! I think everything tied together very nicely - the crispy chicken skin with the sweet warm peach gravy, the tender kale, and the cool fresh cucumbers. My husband even ate the bacon cinders and said they kind of tasted like pork rinds. Success!
The star of dinner tonight was a roasted chicken from Polyface Farms. I rinsed and dried the chicken and then generously salted and peppered it inside and out. The outside I wrapped in bacon from EcoFriendly Foods and the inside I stuffed with two of the season's first peaches from Westmoreland Berry Farm. Into the oven at 425 for 30 minutes, then I reduced the heat to 350 and roasted it for an additional hour.
The plan was to end up with delicious bacon-wrapped chicken and some roasty peach chunks. My oven had other plans!
Now, I've made bacon wrapped chicken before and it's always turned out, but this time for some reason the bacon shriveled to itty bitty bacon cinders and became inedible. So not only did I have burned bacon, but I had flabby chicken skin. Erg. I removed the peaches from the chicken and noticed they were not roasty at all either. My plans had been foiled, but I thought there had to be some way to salvage this food. After a moment's pondering I set the bacon cinders aside and carved the chicken into two leg quarters, two breasts, and two wings. I put the chicken pieces on a foil lined baking sheet and put them back in the oven to turn the flabby skin crispy. What to do with the peaches...aha! Gravy!
To make the gravy, I took the peaches from the chicken cavity and heated them in a small saucepan with a good spoonful of drippings from the roasting pan and 1/4 cup sweet white wine from Rose Bank Winery along with a pinch of salt and about 1 inch of cinnamon stick. I put the heat to low, covered it, and let it simmer while I went to work on the veggie sides. I don't know if Rose Bank Winery can be considered local to northern Virginia, but we used to live about 3 minutes away from this winery and we bought a whole case of the wine that we're still working on! So it was local to us at one point. :)
To get our leafy greens in for the day I made some braised kale from Pleasant Fields Farm. First I sauteed some baby onions from our CSA in the chicken/bacon drippings, then added the kale and a little water, covered, and let it braise for about 15 minutes.
To add some freshness to the meal, I made a quick cucumber salad using crispy little Persian cucumbers from Toigo Orchards. They are so snappy and delicious! I tossed them with some chopped orange mint from Red Rake Farm, a drizzle of extra virgin olive oil, and a splash of rice vinegar. Red Rake Farm is one of my favorite stands at the Arlington Farmer's Market. It's all organic and their produce looks more "real" to me than some of the other places for some reason. And the owner, Peter, is always ready with a smile and story. Much nicer than shopping at a grocery store!
Once the veggies were ready, the chicken skin was crispy and the peaches were nice and broken down for the gravy, and dinner was served! I think everything tied together very nicely - the crispy chicken skin with the sweet warm peach gravy, the tender kale, and the cool fresh cucumbers. My husband even ate the bacon cinders and said they kind of tasted like pork rinds. Success!
Sunday, June 14, 2009
One Local Summer - Week Two
I kind of slacked on One Local Summer this week. I was expecting an abundance of veggies from my CSA, which just started this past Monday, but instead all I got was a handful of salad greens, some garlic scapes, and a head of Chinese cabbage. It's been a rough, wet spring here in Virginia. So I headed to the farmer's market on Saturday (yesterday) morning to get some goodies for this week's local meal.
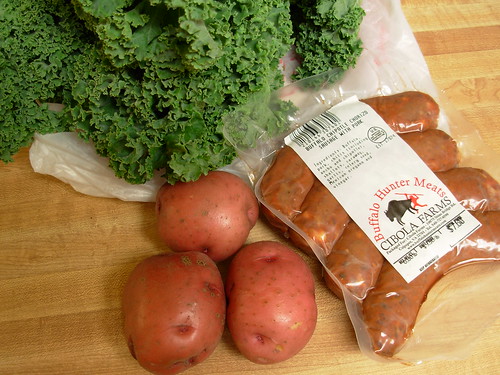
My planned meal included spicy chipotle chorizo made from free range buffalo and pork from Cibola Farms. I also picked up some red potatoes and curly kale from Pleasant Fields Farm. I was going to cut the potatoes and sausage into chunks and roast them together and serve them on a bed of braised kale. Alas, my meal was not to be. My husband and I decided to go to The National Zoo today and ogle the cute animals, which delayed lunch until 3:30 p.m. - a time falling squarely into what we refer to as "the black hole of eating." Neither of us was hungry for dinner in the slightest, so our local feast will just have to wait until tomorrow. Too bad the post can't wait for tomorrow, but OLS has a deadline. ;)
To see what other people in my region (Southern) have been up to, check out last week's roundup!
Thursday, June 4, 2009
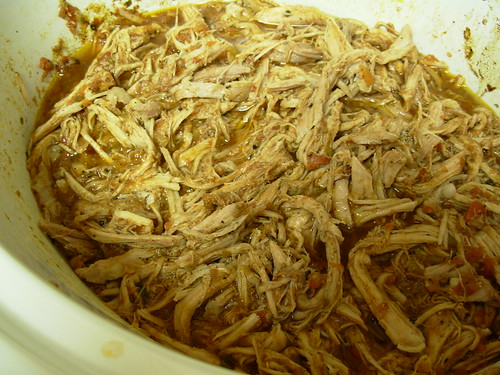
Salsa Pulled Pork
This is probably the easiest recipe I'll ever share with you, and also one of the most delicious and rewarding!
SALSA PULLED PORK
ingredients:
1 jar of your favorite salsa
1 pork tenderloin
Quantities are not exact and don't matter anyway. Put the pork into a crockpot, dump the salsa on top, and cook it on LOW for 6-8 hours. When you're ready to eat, just shred the meat with two forks.
The meat is tender and delicious and people will think you put some serious effort into cooking, but it just couldn't be any easier.
Thursday, May 28, 2009
Son of Grok's Carrot Cake Caveman Cookies
I made these Carrot Cake Caveman Cookies from SoG's blog today:

Go check out the recipe! I think these are more like muffin tops than cookies. No matter what you call them they're pretty yummy.
My tweaks:
I used regular carrots instead of baby carrots
I used 1T pumpkin pie spice instead of nutmeg
I added 1/4 tsp stevia extract
Go check out the recipe! I think these are more like muffin tops than cookies. No matter what you call them they're pretty yummy.
My tweaks:
I used regular carrots instead of baby carrots
I used 1T pumpkin pie spice instead of nutmeg
I added 1/4 tsp stevia extract
Thursday, May 21, 2009
Meal idea: broiled pesto shrimp
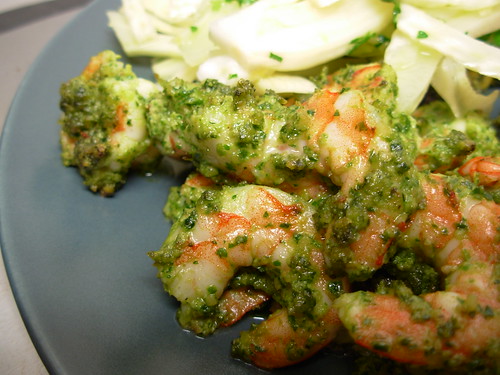
This post is more of a meal idea than an actual recipe. It's really quick to put together and have a dinner in minutes! The basic premise is to thaw out some frozen raw shrimp, toss them in pesto, and broil them for 3 minutes (or until they turn pink). That's it! You're done! For pesto, I usually just throw whatever herb we have that looks good into a food processor along with whatever nuts I have. Tonight I had a big bunch of parsley, so I threw that in there with a handful of walnuts and a few green onions for bite, lemon zest and juice and a pinch of red pepper flakes for kick, and extra virgin olive oil to thin it to the right consistency. If you really like pesto, you can make a lot at once and freeze it in an ice cube tray, then pop the cubes out and store in a baggie - this way you can grab both the shrimp and the pesto from the freezer at the same time and make this even more of a convenience meal.
I had some extra pesto tonight so I chopped up some zucchini and yellow summer squash, tossed them in the extra pesto, and broiled them too. We also had a fennel salad on the side. Just thinly slice a fennel bulb and dress with extra virgin olive oil and lemon juice. You can add some minced parsley, fennel fronds, or lemon zest if you want to get a little bit fancy.
Tuesday, May 19, 2009
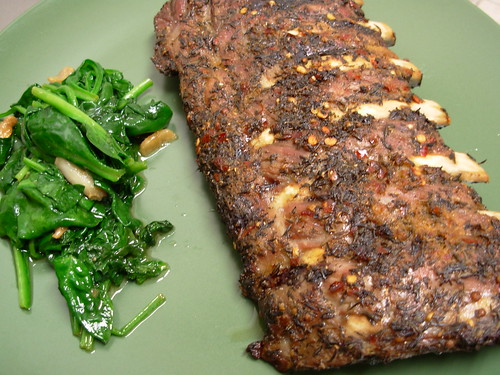
Jamaican Ribs
I really like ribs, but I hardly ever eat them since they're almost always covered in some kind of sweet sugary sauce. They intimidated me for some reason, so I never considered cooking some myself - they just seemed like they required a lot of equipment I don't have, like a grill or a smoker. Well I finally got over my fear of cooking healthy sugarless ribs at home with the following recipe. It uses a Jamaican inspired marinade followed by slow oven cooking to produce some nice tender ribs with a pleasing herby crust. I hope you'll enjoy it as much as I did!
serves 2
ingredients:
1.5 lbs pork baby back ribs
1 T dried thyme
1 tsp sea salt
1 tsp onion powder
1 tsp red pepper flakes
1 tsp black pepper
1/4 tsp garlic powder
1/4 tsp ground nutmeg
1/4 tsp ground or crushed coriander
1/2 cup water
2 T extra virgin olive oil
Combine all the ingredients in a plastic bag and marinate for at least 1 hour, but 3 hours is better. Preheat the oven to 290 degrees Fahrenheit. Line a baking sheet with foil and lightly oil it with some extra olive oil. Lay the ribs on the baking sheet and cover tightly with foil. Bake for 2 hours. Remove from the oven and drain any liquid. Heat up the broiler. Broil ribs meaty side up for 5 minutes to crisp up.
You can double this easily and make some tasty leftovers. I had some leftovers for lunch the next day and they were great.
Recipe is adapted from Eating Stella Style by George Stella.
This recipe is part of the Natural Cures Healthy Recipe Blog Carnival over at Hartke is Online!
Saturday, May 16, 2009
Lemon Curd Bars, Gary Taubes, and the Liberation Diet
I had a lot of foodie fun this weekend. This morning I had the pleasure of seeing Gary Taubes give a lecture on his book Good Calories Bad Calories and even got to meet him for a minute afterwards and get my book signed and a quick answer to a question. I asked him if he ever thought low-carb had a prayer of gaining mainstream acceptance and he said that if anything he foresees a cognitively dissonant compromise - that carbs are bad but that fat (especially saturated fat) is also bad.

Gary Taubes speaking.
After the Taubes breakfast my sister and I headed off to another lecture given by a book author, The Liberation Diet. by Kevin Brown. He was a pretty engaging speaker and spoke out very strongly against all forms of modern industrialized food. I spoke with him a little before and after his presentation and I may have an opportunity to work with some of his clients by helping them change their diets by coming to their homes and cooking for them! I'm pretty excited by this idea and I hope it pans out.
The Liberation Diet meeting was a potluck and the dish I brought was these Lemon Curd Bars which I found over at The Nourishing Gourmet. If you use coconut oil instead of butter, these bars make a great occasional primal treat. I would have a picture for you but the pan got devoured pretty quickly; rest assured they looked exactly like the original and tasted amazing! The lemon curd is simple, just five ingredients, but beyond delicious. Even if you don't make the nut bars to go underneath, the curd is really something special.
Tuesday, April 28, 2009
Grain Free Almond Crackers
Sometimes you just want something crunchy, or you want something to spread your favorite dip on rather than just eat it with a spoon. This is one of the banes of low carb/paleo existence. Luckily, it's dead easy to whip up some almond crackers to satisfy on both counts! You can enjoy them as is or use them as vehicles for other tasty food such as guacamole or pate. You could even make them into dessert by adding some cinnamon or pie spice to the dough and perhaps a touch of honey or maple syrup.

GRAIN FREE ALMOND CRACKERS
ingredients:
1 cup almond flour
1 egg white
1 pinch salt
(that's it!)
Preheat the oven to 325 degrees.
In a bowl, mix together the almond flour, egg white, and salt until it forms a paste.
Line a cookie sheet with parchment paper. Make sure you use parchment paper, because if you don't you'll end up chipping your crackers out of the pan. Place the dough in the middle and top with another piece of parchment paper. Using a rolling pin (or any other cylindrical instrument), roll out the dough as thin as you can get it. Try to make it take up the whole cookie sheet if you can. Super thin. I mean it!
Peel off the top layer of paper and score the dough with a knife into whatever size crackers you want. Bake in the 325 oven for 10 minutes and then check on the crackers. You are looking for them to color ever so slightly. A little color means crispy, but a lot of color means burned nut taste, which is no good. If the edges have started to color nicely, remove them to a plate and put the remaining crackers back in the oven. Keep doing this, checking every 5 minutes and removing the golden crackers, until finally they are all baked to perfection.
Cool completely and store in an airtight container.
You can make many variations on thee crackers by adding in different seasonings to the dough base. Go nuts! (hur hur)
Subscribe to:
Posts (Atom)

